A practical guide to match your resin, output targets, and quality requirements without overpaying.
Polyethylene (PE) films are everywhere – from food packaging to agricultural mulch and industrial liners. But setting up a production line that consistently delivers high‑quality film while keeping energy and scrap low is not trivial. Many buyers focus only on price or brand, then struggle with uneven thickness, poor bubble stability, or low output per hour.
This guide walks you through five concrete selection steps. You will learn what to check inside the extruder, how to match screw geometry to your PE grade, why cooling matters more than you think, and when to invest in automation. No marketing fluff – just engineering logic and field experience.
Step 1 – Match the screw design to your PE resin
Different PE types behave very differently under heat and shear. LDPE (low‑density) has high melt strength and flows easily – it tolerates simple general‑purpose screws. LLDPE (linear low‑density) requires more efficient mixing and a longer compression zone to break its high viscosity. HDPE (high‑density) demands high shear and precise temperature control to avoid thermal degradation.
Ask your potential supplier: What is the L/D ratio (length‑to‑diameter) of the screw? For blown film, a ratio of 28:1 to 32:1 is common. Below 25:1 you risk poor melting and unstable output when running LLDPE blends. Also check the barrier screw design – it separates melted from solid material, giving you up to 25% higher throughput compared to a conventional three‑section screw.
A common mistake is using the same screw for all PE grades. One processor in Vietnam replaced a general screw with a dedicated LLDPE barrier screw and saw bubble stability improve immediately, plus a 15% drop in gel counts. So always request screw geometry drawings for your actual resin recipe.
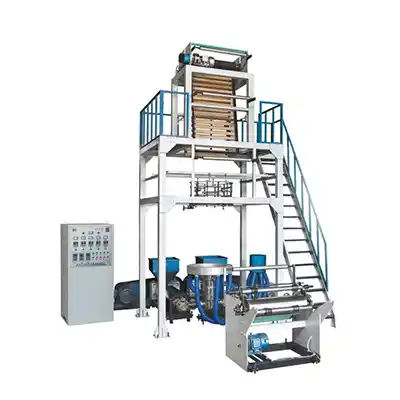
Step 2 – Die design and bubble cooling capacity
The die determines how evenly the melt is distributed around the circumference. Spiral mandrel dies (with 4, 6, or 8 ports) are the gold standard for PE because they eliminate weld lines and produce uniform gauge. Coil‑type or screen‑pack dies are cheaper but often cause thickness variations beyond ±8%, which directly wastes raw material.
But even the best die fails without adequate cooling. Cooling air rings – single‑lip vs. dual‑lip vs. adjustable IBC (internal bubble cooling) – make or break your linear speed. For a 150mm die producing 50‑80 kg/h of LDPE film, a dual‑lip air ring is the minimum. For high‑output lines (>120 kg/h), you should consider IBC combined with external cooling, which can raise output by 30‑40% while using the same die diameter. Validate the cooling system’s claimed air flow (m³/h) and temperature consistency – many budget suppliers undersize the blower.
Step 3 – Calculate total cost of ownership, not just purchase price
A cheaper extrusion line often hides higher energy consumption and more frequent downtime. Compare specific energy consumption (kWh per kg of film). For a modern AC‑drive extruder with barrel insulation and efficient heaters, you should see 0.35‑0.45 kWh/kg for LDPE. Older DC drives or uninsulated barrels can exceed 0.65 kWh/kg. Over 4,000 operating hours, that difference adds up to thousands of dollars.
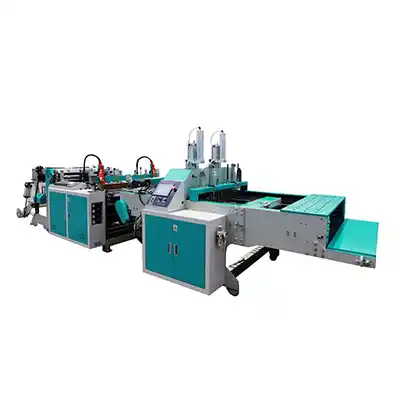
Also examine the winder. Surface winders are fine for thin films (<50 microns) but struggle with roll hardness consistency. Center winders or gap winders give you better control for thicker films and larger roll diameters. Ask for a winding tension control diagram – open‑loop systems (without tension feedback) often produce telescoped rolls or crushing marks.
Selection checklist you can use today
-
Screw L/D ≥ 28:1 for LLDPE/HDPE, barrier design preferred
-
Spiral mandrel die with at least 6 ports for diameter >120 mm
-
Dual‑lip air ring for >80 kg/h, IBC for >150 kg/h
-
AC drives with documented specific energy <0.5 kWh/kg
-
Winder with closed‑loop tension control (load cell or dancer)
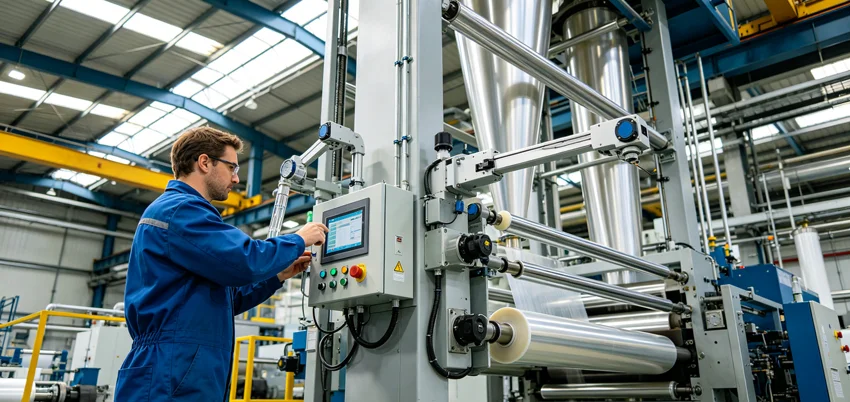
Step 4 – Automation level: what pays back quickly?
Many independent operators skip automatic gauge control (AGC) to save upfront cost. But manual profile adjustment requires a skilled operator to climb the tower and tweak each bolt – often done once per shift, leaving you with thickness variations that cost 5‑8% extra material. Automatic IBC and autoprofile die systems pay for themselves within 6‑12 months on medium‑volume lines.
Less known but equally valuable: melt pressure and temperature monitoring at the adapter. Without these sensors, you cannot detect screen pack clogging or barrel temperature drift early. A sudden pressure spike can burst the bubble or damage the die. So insist on at least three pressure transducers (after the screw, before the screen changer, and at the die inlet). Data logging capability is a nice bonus for troubleshooting.
Step 5 – Three common mistakes and how to avoid them
Mistake 1 – Ignoring post‑sales support for the screw and barrel.
Standard wear parts like screws, barrels, and air rings need replacement every 8,000‑12,000 hours for general PE. If the supplier cannot provide a wear measurement protocol or local stock of spares, you risk weeks of downtime. Before signing, ask for a wear warranty (minimum 12 months against abrasion) and documented spare part availability.
Mistake 2 – Buying oversize equipment “for future needs”.
A 120 mm extruder running at 20% of its max speed consumes almost as much energy as at 80% due to fixed heater losses. It also degrades PE due to long residence time. Size your line to 70‑80% of its maximum output for your primary film – that gives you flexibility without energy waste.
Mistake 3 – Neglecting the bubble cage and collapsing frame.
Cheap cages with small rollers cause scratches and static build‑up, especially for thin LLDPE films. Look for adjustable collapsing frames with rubber‑covered rollers and antistatic bars. This small detail directly affects your final roll appearance.
Making your final decision
After evaluating screw design, cooling, energy cost, and automation, you might still feel overwhelmed by technical choices. That is normal – every line is a compromise between throughput, film quality, and budget. The most reliable approach is to provide a detailed resin specification (MFI, density, additive package) and your target output to three potential suppliers, then compare their proposed screw geometries and cooling configurations side‑by‑side.
If you want to see how these principles are applied in a pre‑configured extrusion platform, take a look at advanced extrusion solutions for PE that include barrier screws, spiral mandrel die, and closed‑loop winding as standard – Yongbang Machine offers multiple modular options validated on LDPE/LLDPE blends. You can also request a custom screw design for your exact resin recipe. Click here to compare technical parameters of their production lines and see real throughput test reports.
Alternatively, if you are still unsure about the cooling or winding configuration for your specific film thickness, reach out to their engineering team for a no‑obligation line layout proposal.
References
-
ASTM D1238 – Standard test method for melt flow rate of thermoplastics
-
Industry data: typical specific energy consumption based on Plastics Technology magazine (2022 extrusion benchmark survey)
 Brochure Download
 FAQ
FAQ